We have a guest blog post from one of our trainers, Devan Amundsen, who is writing about life with his new puppy! Check out ‘The Pup Blog!’
Well Wade is out cold! He naps so much, it’s almost easy to forget he’s in my life now!
But, when he isn’t napping, he’s biting.
He chews on absolutely everything.
So how do you manage it?
Obviously, it’s an extremely normal puppy behavior. Their teeth are growing, their gums hurt, and chewing is a fantastic way to pass the time!
Great. Just don’t chew on my shoes… Or the carpet… Spit out that rock! DON’T EAT THAT!!
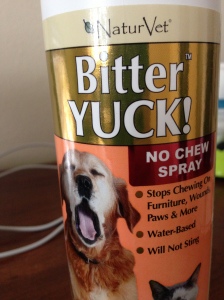 So far, I’ve coated all power chords he can get to with some bitter “yuck” spray. It tastes incredibly bitter, and Wade hates it. You can even just use white vinegar diluted with water.
This stuff works great. Every time I catch him chewing on something that I can’t move out of his reach, I just spray some of this on there.
Corners of rugs, edges of furniture, power cords, baseboards, everything and anything my pup can chew on that I don’t want him to has a small amount of this on there.
So far, it’s working really well. He learned immediately that power cords taste disgusting, and why would he want to chew on something disgusting?t
But it’s mean and non-sensical to just walk around and tell him what he can’t chew on.
That’s where this little group of indispensable items comes in handy.
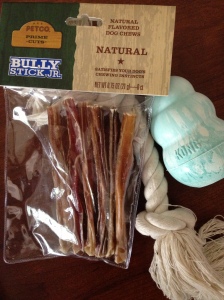 I’ve been using these constantly with Wade.
Every time I catch him chewing on something, I take it away from him, say “no,” (Calmly and neutrally,) and hand him one of these things to occupy his time.
He immediately forgets all about what he was doing, and happily gnaws away at something good for him!
The rope is great for his teeth, massaging his gums and providing something soft, but firm to chew on.
The bully sticks are STINKY! They smell awful! But he loves them. C’est la vie. My only warning with these is not to leave him unattended for too long with one. Wade did chew on one for basically a whole day, and it turned into a soggy mess that he ended up half-swallowing. Thankfully, I was there to take it from him.
That’s another thing. Take things from your puppy. A lot. Take it, praise him, maybe give him a treat, and then give it back. That way, your puppy knows, “Whenever someone takes something from me, it’s okay! I get a treat and I get it back eventually anyway!” Possessive issues solved.
I almost forgot about my favorite toy of all… The Kong. Wade absolutely loves his Kong. I have two, and I have one stuffed at all times. I stuff it almost entirely with food, but layer it with Kong stuffing so it stays interesting and challenging all the way through. Wade LOVES IT! He gets all of his meals through a Kong or hand-fed to him.
I almost forgot… Play-biting.
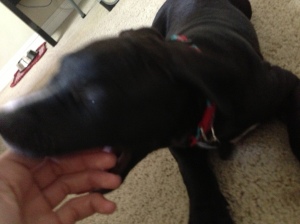
This picture was probably counter-productive, because it took 2 straight minutes of him biting my hands before I could get an acceptable picture… But he looks VICIOUS!
Wade is being such a little butt-head about biting! He likes to nip at fingers, clothes, and even faces when he’s playing! AHHH!!
This is normal puppy behavior as well, and as much as I’d like to teach him never to bite anyone ever, it’s too early for that.
Why?
Let’s say you taught your puppy to never bite anyone ever. Extremely reasonable, and your puppy should be doing that soon.
But not yet.
First, we need to teach him bite inhibition. Teach him that his mouth is a tool he can use sometimes, especially when playing with other dogs, but that he needs to be GENTLE! We’re teaching a “soft-mouth.” That way, one day when a small child scares the heck outta your dog by running up and jumping on him, the dog won’t turn around and bite with all of the immense power possible.
Basically, bite inhibition keeps a dog from doing actual damage if there was ever a need to use his/her mouth.
Teaching bite inhibition:
- Play with your pup. Be rough.
- When the pup uses any bite force whatsoever, yelp and pull your hand away.
- If your pup bites you three times in a row, stop the play session immediately, but calmly. Call him/her a bully, and walk away.
- Your puppy is going to be like, “What!? I was playing with thaaaaat!”
- When you come back into the room, make your pup sit calmly before initiating another play session.
It’s that easy.
Once your pup has a nice soft mouth, (about the time he gets his grown-up teeth,) We can teach him that with these new grown-up teeth, he is not allowed to bite. Ever.
Teaching Not to Bite:
- Any time your pup puts teeth on you, yelp, and walk away.
That’s it. End of story. Biting is restricted exclusively to toys… And maybe other dogs…
A fantastic way to reinforce bite lessons is to just let your puppy play with other puppies! There’s options everywhere, just search around. What you’re looking for is for your puppy to get some experience playing with other puppies. Other puppies instinctively know what’s appropriate, and what isn’t.
Your puppy should be playing with other puppies as SOON AS POSSIBLE!
So there you have it. Your quick guide to chewing, bite inhibition, and play biting.
0.000000
0.000000
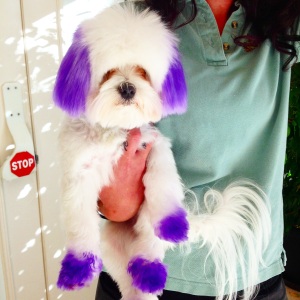 a bunch by introducing pet dye. Personally I love that there is an option to spice up my dogs coat. But there are some pro and cons with dyeing your pet, you first must make sure that it is pet safe dye that you are using. Some people think that dying your pet is awesome and some people think its cruel, the most important thing to remember is the safety of your pet if you decide to add some color.
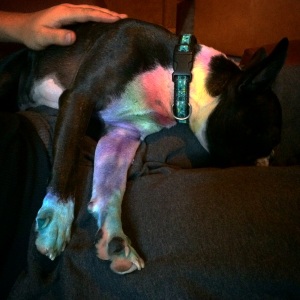 way is to use Manic Panic or Kool- Aid, I’ve used dog friendly blow pens, chalk, Manic Panic, and gel. While personally I prefer the blow pens since they only last about a week or so, Manic Panic is more permanent choice which usually lasts about 2 weeks. My boys are used for events for my work all the time, Dipper my Boston Terrier loves being dyed and will strut his stuff for anyone watching as long as he has a little more color in his coat.
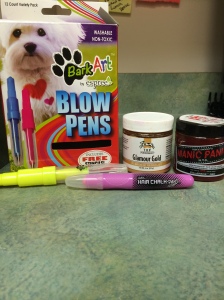
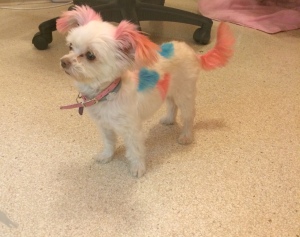 Nowadays you’ll see dogs looking like tigers, pandas, people chose certain themes just like we put a bunch of hearts on my co-workers dog.
 I like to think that I’m a pretty experienced baker but have never tried making treats for my dogs. I found a couple of good, healthy, and potentially grain free recipes to try out. So for this trial round I’m going to try a peanut butter sweet potato treat that makes roughly 2 dozen cookies.